Available lang sa Ingles ang dokumentasyon ng produkto.
Your firm profile and details
Your firm profile is the home for your firm's core details: its logo, its name, the timezone and currency Esqase uses everywhere, and the ways clients and members can reach you. These details flow through the whole product, so the logo your team sees in the sidebar, the times shown on bookings, the currency on invoices, and the name your clients see all start here.
You manage everything on this page from Settings > Profile.
Before you begin
- You need to be signed in to Esqase with a verified email address. If your email is not verified yet, Esqase prompts you to confirm it before you can open Settings.
- Some details on this page are restricted to firm owners. See Some fields are restricted to firm owners below for the full breakdown.
- The page shows the details for your active firm (the firm currently selected in the firm switcher at the top of the sidebar). If you belong to more than one firm, make sure the right firm is active before you edit. See Switch between firms or add another firm.
Open your firm profile
- In the sidebar, click Settings.
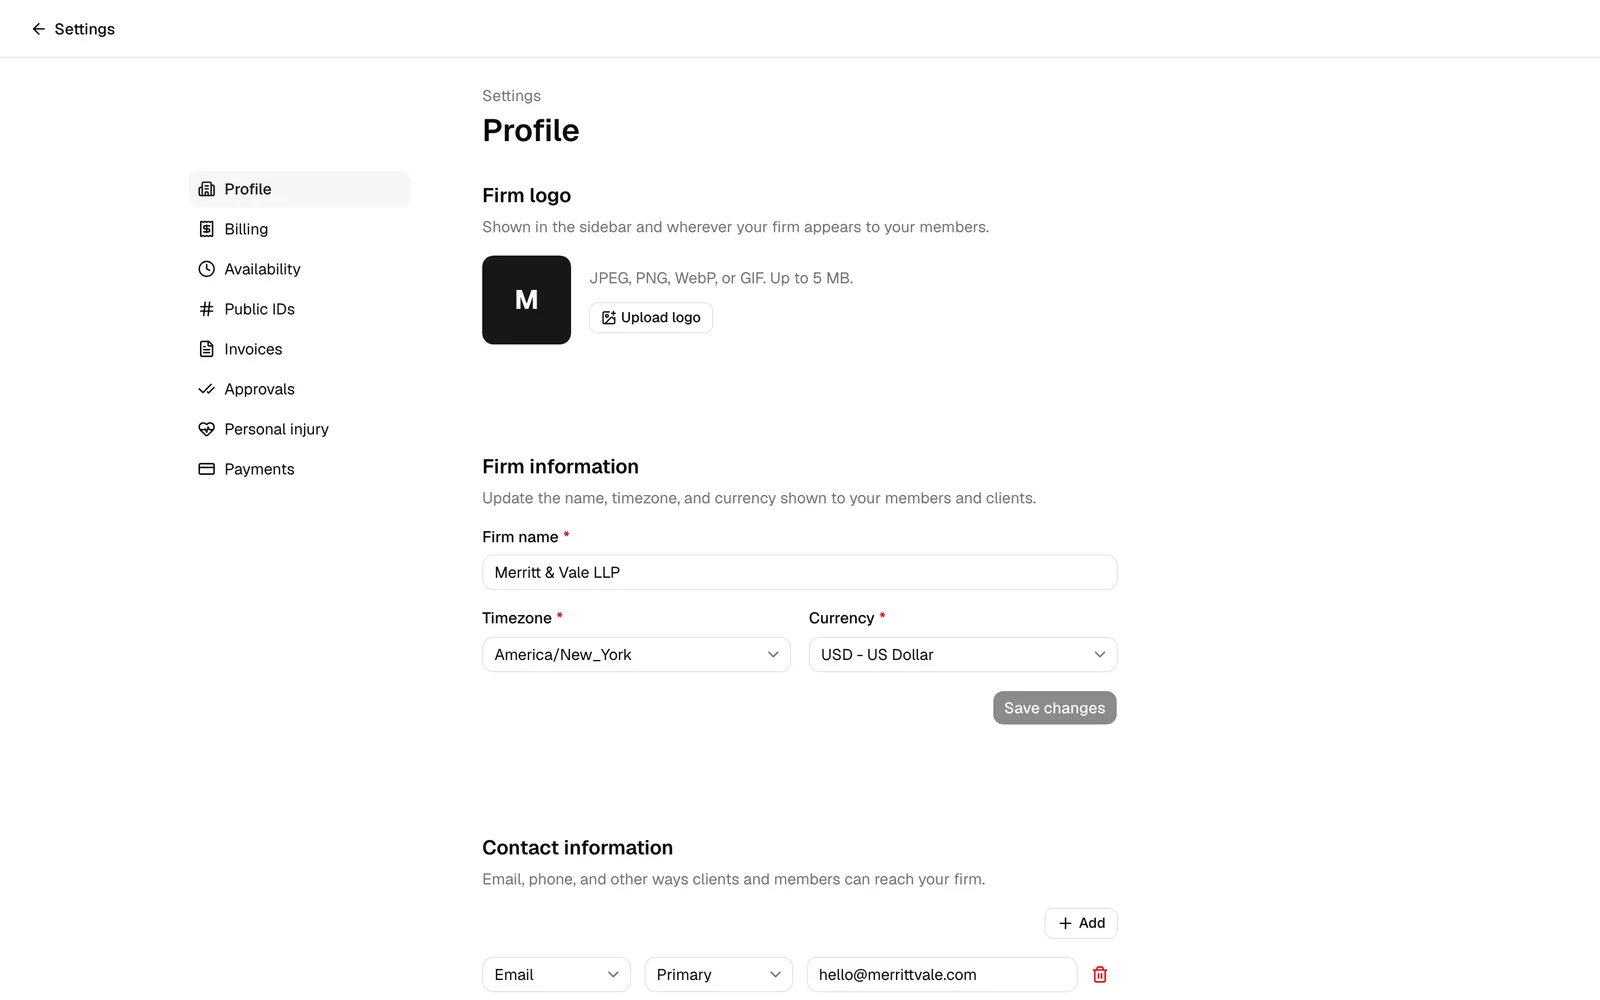
- In the settings sidebar, click Profile. This is the first item, marked with a building icon.
- The Profile page opens with stacked sections: Firm logo at the top, then Firm information, Contact information, and Firm address.
Note: The links you see in the settings sidebar depend on your role. If your role does not include view access for a given area, that link does not appear, and visiting it directly shows a "no access" message.
Add or change your firm logo
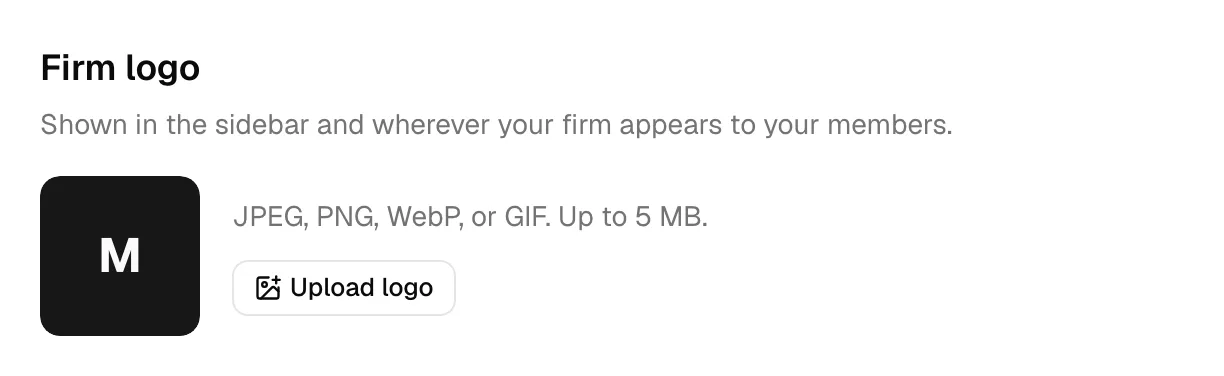
The Firm logo section, at the very top of the page, is where you set the image that represents your firm inside Esqase. Once you add a logo, it appears in the firm switcher at the top of the sidebar (both on the active-firm button and in the list of firms when you open the switcher), in place of the letter tile Esqase shows by default.
Until you add a logo, Esqase shows a square tile with the first letter of your firm's name. That letter stays in place everywhere your logo would otherwise appear.
- Open Settings > Profile.
- In the Firm logo section, look at the square preview on the left. It shows your current logo, or the firm's initial if you have not added one yet.
- Click Upload logo (or Change logo if you already have one).
- Choose an image from your device. It must be a JPEG, PNG, WebP, or GIF file, up to 5 MB.
- Esqase uploads the image. While it works, the button reads Uploading... with a spinner, and the preview updates to your new image right away. When it finishes, a Firm logo updated confirmation appears.
To remove your logo and go back to the initial tile, click Remove next to the upload button. Esqase confirms with Firm logo removed, and the preview returns to your firm's initial.
Note: The preview in this section updates the moment your upload finishes. The logo in the sidebar firm switcher refreshes shortly after, usually within about a minute, so if the old letter tile is still showing there, give it a moment or reload the page.
Tip: Use a clear, roughly square image so it reads well in the small sidebar tile. Logos with a transparent background (PNG or WebP) sit most cleanly against the sidebar.
Who can edit this
Uploading, changing, or removing the firm logo is owner only, since it is part of your firm's identity. If you are not a firm owner, the Firm logo section still shows the current logo (or the firm initial), but the Upload logo, Change logo, and Remove buttons do not appear, so you can see the logo without changing it.
Edit your firm profile (name, timezone, and currency)
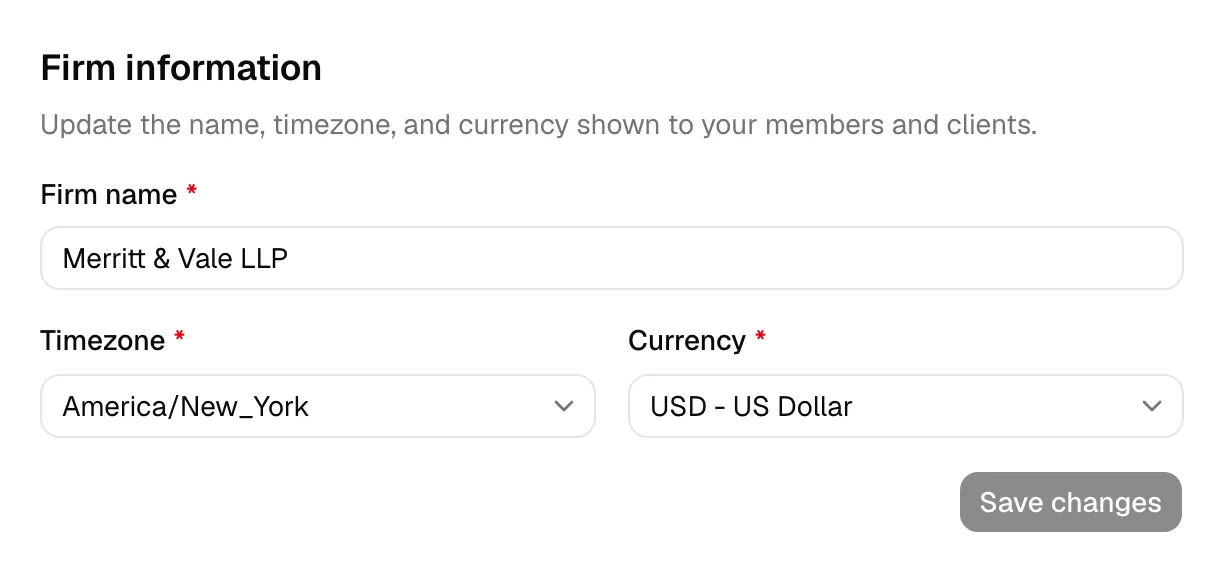
The Firm information section, at the top of the page, holds your firm's identity: its name, timezone, and currency. These appear to your members and clients across Esqase, so keep them accurate.
- Open Settings > Profile.
- In the Firm information section, update any of the following fields:
- Firm name (required). The display name for your firm. It must be at least 2 characters and no more than 120. This is the name shown in the firm switcher and on client-facing pages.
- Timezone (required). Start typing to search the list, then choose your firm's timezone (for example, your city or region). Esqase uses this timezone to generate booking slots, display calendar events, and time-stamp activity, so it should match where your firm operates.
- Currency (required). Start typing a currency code or name to search, then select the currency Esqase should use for new invoices, payments, and other money amounts.
- Click Save changes.
The Save changes button stays disabled until you actually change something, so if nothing is dirty you cannot save by accident. While the save is in progress the button shows a spinner and reads Saving.... When it succeeds, a Firm updated confirmation appears.
Important: Changing your currency does not rewrite past records. As the form notes, existing transactions keep their original currency, and only new transactions use the new currency. Switch currency only when you are sure, since a firm typically operates in a single currency.
Tip: Timezone here drives the times your clients see when they book meetings. If bookings are showing up at the wrong hour, check that this timezone is correct before adjusting anything else.
Who can edit this
The firm name, timezone, and currency are part of your firm's identity, so only firm owners can change them. If you are not an owner, you can still see the current values, but the fields are read-only, a note under the name field reads "You don't have permission to update the firm," and Save changes stays disabled.
Add and manage firm contact methods
The Contact information section is where you record the email addresses, phone numbers, and other channels clients and members use to reach your firm. You can list as many as you need, each with its own type and label.
- Open Settings > Profile.
- Scroll to the Contact information section.
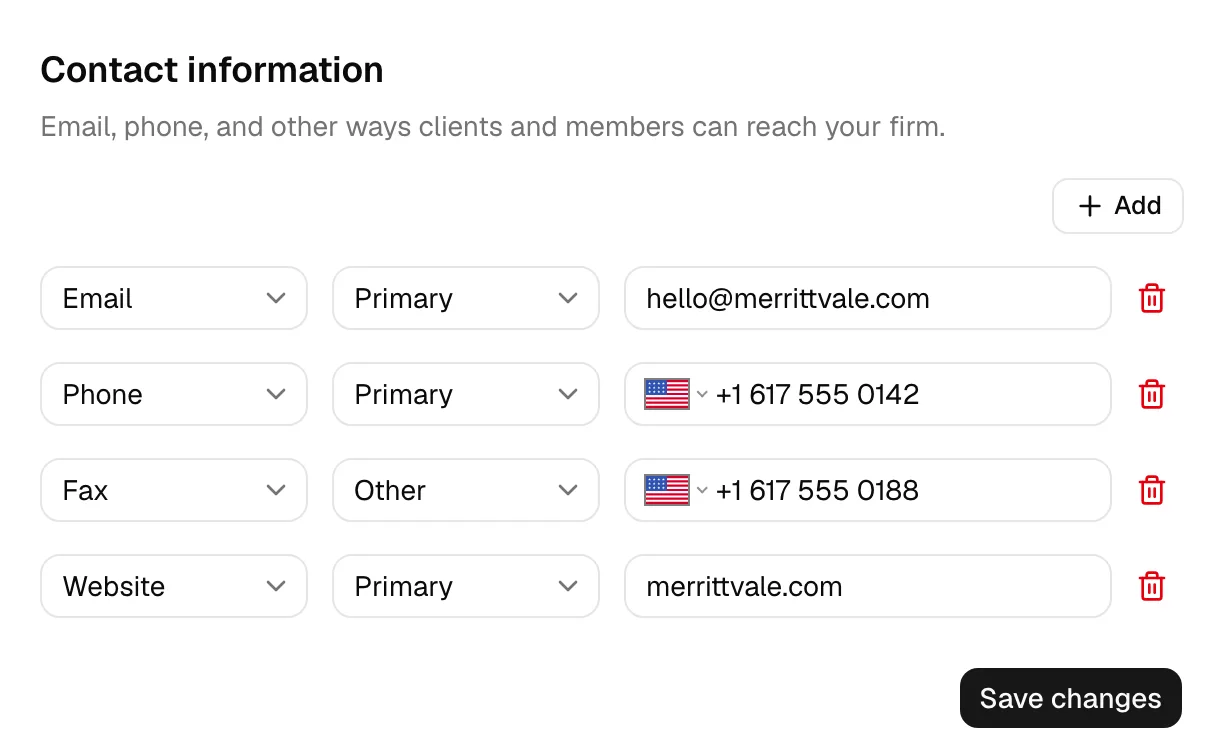
- Each row is one contact method made up of three parts:
- Type. The kind of channel. Choose from Email, Mobile, Phone, Fax, Website, Social, Messaging, or Other. For phone-style types (Mobile, Phone, Fax), the value field becomes a phone-number input with a country selector; for the others it is a plain text field.
- Label. What this channel is for. Choose from Primary, Secondary, Work, Home, Billing, Legal, Support, Emergency, or Other. Labels help everyone understand which number to call or which inbox to email.
- Value. The actual address or number (for example,
email@firm.com, a phone number, orwww.firm.com). This is required for each row.
- To add another channel, click Add. A new row appears, ready for you to fill in.
- To remove a channel, click the trash icon at the end of its row. You cannot remove the last remaining row.
- When you are done, click Save changes.
By default this section starts with one Email row and one Phone row, both labeled Primary, so you can fill them in right away.
Note: Every row you keep must have a value. If you try to save with an empty row, Esqase highlights it and asks you to add at least one contact channel, or to review the highlighted fields.
Who can edit this
Firm owners can always edit contact methods. Other members can edit them only if their role includes update access for firm contacts. If your role does not, the fields and the Save changes button are disabled, and you can view the existing details only.
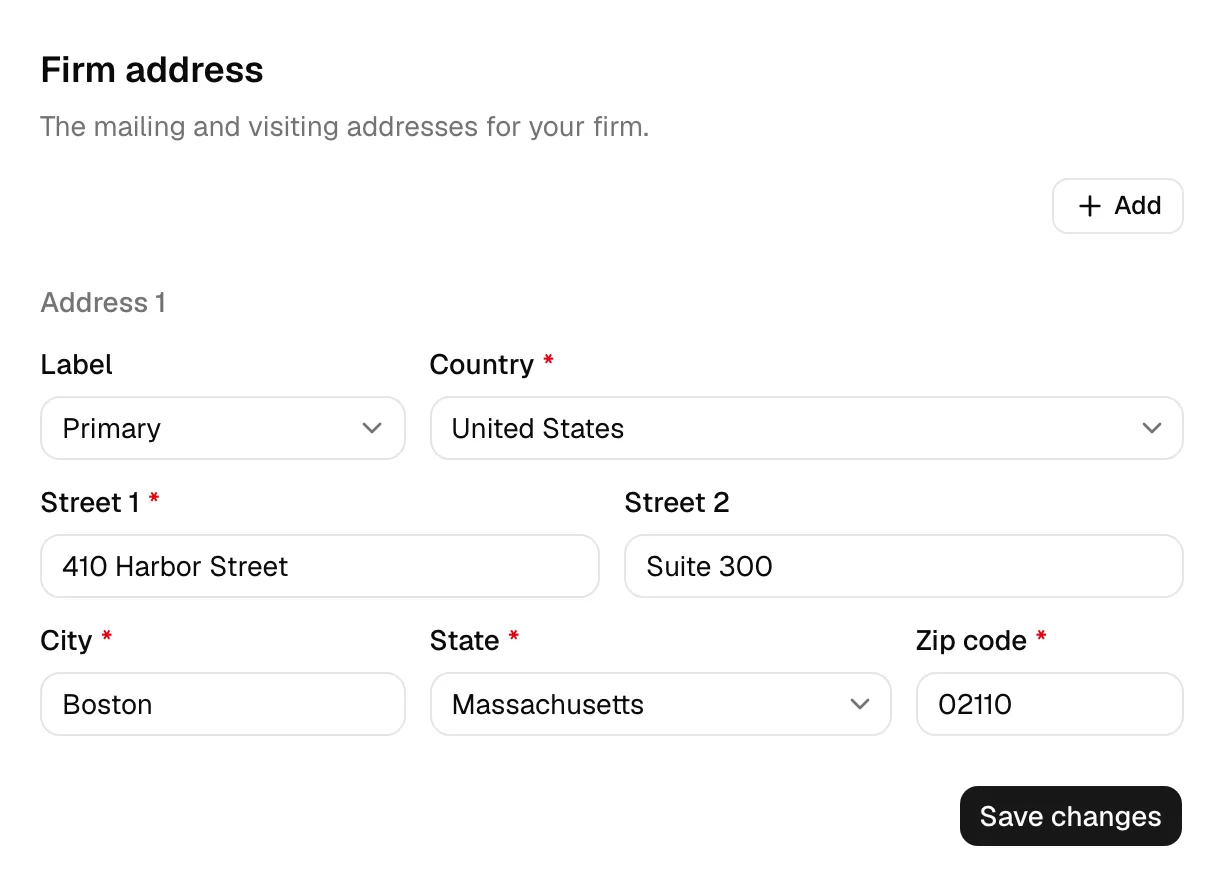
Add and manage firm addresses
The Firm address section records your firm's mailing and visiting addresses. You can add more than one (for example, a main office and a registered address), each with its own label and country.
- Open Settings > Profile.
- Scroll to the Firm address section. The first address is headed Address 1.
- Fill in the fields for each address:
- Label. What this address is for. Choose from Primary, Secondary, Work, Home, Billing, Registered, Service, or Other.
- Country (required). Choose the country. Your selection changes the labels and inputs below it: for the United States and Canada you pick a state or province from a list, and the state and postal-code labels adjust to match the country (for example, "ZIP code" versus "Postal code").
- Street 1 (required). The main street address line.
- Street 2 (optional). A suite, unit, floor, or similar.
- City (required).
- State / Province / Region (required). For the US and Canada this is a searchable dropdown; for other countries it is a text field, and the label follows the country.
- Postal code / ZIP code (required). The label follows the selected country.
- To add another address, click Add. A new block headed Address 2 (and so on) appears.
- To remove an address, click the trash icon in that address block's header. The trash control appears only when you have more than one address, so you always keep at least one.
- When you are done, click Save changes.
Note: Esqase requires the core address fields (Country, Street 1, City, State/Province, and Postal code) on every address you keep. If any required field is blank, the form highlights it and asks you to review the highlighted fields, or to add at least one address.
Tip: Use clear labels like Billing or Registered so the right address is obvious to anyone on your team who needs it later.
Who can edit this
Firm owners can always edit addresses. Other members can edit them only if their role includes update access for firm addresses. Otherwise the fields and Save changes are disabled and you can view the addresses only.
Turn AI document indexing on or off
Esqase can read the contents of the documents your firm uploads and writes, so that content search and firm-wide search can find a document by what it is about, not just by its name. The AI document indexing switch, in a Data section on the Profile page, lets a firm owner turn that processing on or off for the whole firm.
- Open Settings > Profile.
- Scroll to the Data section, near the bottom of the page.
- Use the AI document indexing switch to turn it on or off. The change saves immediately. Turning it on shows an AI document indexing is on confirmation; turning it off shows AI document indexing is off for new and updated documents.
With the switch off, new documents and documents you update stop being sent for that processing, so nothing new is read to build a description or a search index for them. Existing content already indexed is not deleted by turning this off. See Search your documents for how content search behaves with this on or off.
Note: This section is owner-only. If you are not a firm owner, you will not see the Data section on this page at all.
How your firm's country sets phone and address defaults
Your firm's country is chosen when the firm is first created, in the Profile step of the firm setup flow. See Quickstart: set up your firm.
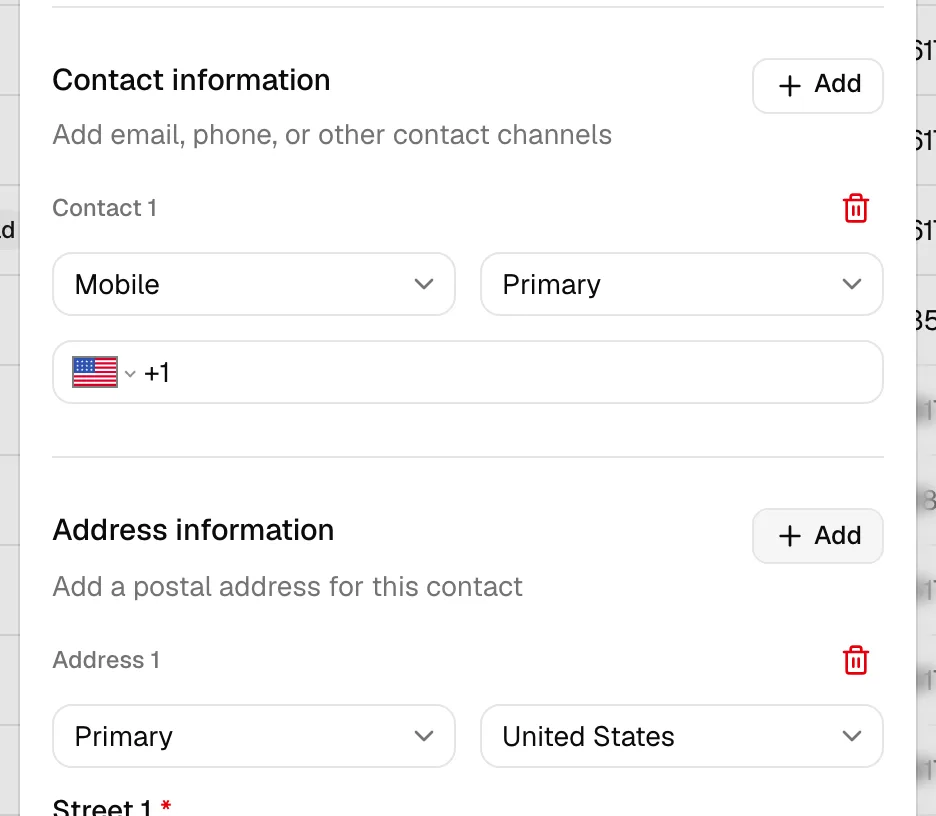
Esqase uses that country as the starting point for every place you type a phone number or an address, so a firm in the Philippines sees +63 and the Philippine flag on phone inputs and Philippines already chosen in country dropdowns, without anyone setting it per field.
This applies to:
- Phone and mobile numbers. The dial code and flag on the number input preselect your firm's country. You still type the number itself.
- Address fields. The Country dropdown preselects your firm's country, and the fields below it (the state or province list, and the state and postal-code labels) follow that country as usual.
You will see the default in the new and edit contact dialogs, on leads, on matters, in the custom-fields dialog on a contact, lead, or matter, in the new-matter wizard, in the form builder and its preview, on your own Settings > Account page, on your firm's own contact details and addresses, on client intake forms, on your public booking page, and on payment forms.
Note: The preselected country is a starting point, not a restriction. You can change the country on any individual phone or address field, and Esqase keeps whatever you choose. Use this whenever a client, an opposing counsel, or a witness is based somewhere else.
Two rules keep the default from touching anything you have already recorded:
- Only empty fields get the default. A phone number or address you have already saved keeps the country it was saved with, even if that differs from your firm's country. Opening the record again shows it exactly as you entered it.
- Showing a country is not the same as saving one. An Address custom field that you add to a record but never fill in displays your firm's country in the dropdown, but nothing is saved for it. The address is only recorded once you actually enter something in it.
Note: If your firm has no country recorded, phone and address fields fall back to the United States. If the firm's country is ever updated, the new default applies only to entries you add afterwards; phone numbers and addresses already on your records are left exactly as they are.
Switch between firms or add another firm
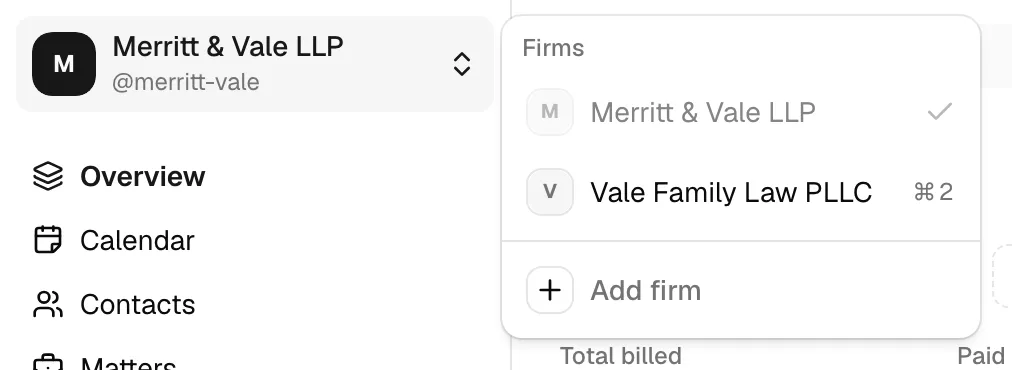
If you work with more than one firm in Esqase, you do not need separate logins. The firm switcher at the top of the sidebar lets you move between firms, and everything you see (matters, contacts, settings, billing) reflects whichever firm is active.
Switch to a different firm
- At the top of the sidebar, click your firm's name. Your firm shows its logo in a square tile (or its initial if no logo has been added), the firm name, and its handle (the
@username used for booking and client links), with an up-and-down chevron at the right. - A menu opens under the heading Firms, listing every firm you belong to. The active firm has a check mark next to it.
- Click the firm you want to switch to.
- Esqase switches your active firm and reloads so every page reflects the new firm. A spinner shows on the firm you are switching to while this happens.
Note: Switching firms changes which firm's data you are working in everywhere in Esqase, not just on this page. After switching, double-check the firm name at the top of the sidebar before making changes.
Add another firm
- Open the firm switcher at the top of the sidebar.
- At the bottom of the menu, click Add firm (the item with a plus icon).
- Esqase opens the new-firm setup flow, where you enter the new firm's profile (name, country, timezone, currency, and a few onboarding details), its contact information and addresses, choose a subscription, and optionally invite teammates.
- When you finish, Esqase makes the new firm your active firm and takes you to its dashboard.
Note: If you change your mind, click Cancel on the first step (Firm profile), just below the Continue button, to return to your current dashboard without creating the new firm.
For a step-by-step walkthrough of that flow, see Quickstart: set up your firm.
Tip: Adding a firm creates a brand-new, separate workspace. It does not copy contacts, matters, or members from your existing firm.
Note: The new firm needs its own subscription. If you leave setup at the Subscription step, the new firm stays your active firm and Esqase returns you to that step until you choose a plan. Use the Return to button on that step to switch back to your other firm's dashboard at any time.
Note: One account can belong to up to 5 firms. A new firm may also start without a free trial if a previous firm on your account already used one and later lapsed; in that case you choose a plan right away. See Your Esqase subscription.
Some fields are restricted to firm owners
Esqase splits this page's editing rights so that firm-defining details stay in the hands of firm owners, while day-to-day contact details can be delegated to members who have the right access.
- Firm logo: owner-only. Non-owners see the current logo (or the firm initial) but do not see the Upload logo, Change logo, or Remove buttons.
- Firm name, timezone, and currency: owner-only. Non-owners see the current values but cannot change them, and Save changes in the Firm information section stays disabled.
- Contact methods: editable by firm owners and by members whose role includes update access for firm contacts.
- Addresses: editable by firm owners and by members whose role includes update access for firm addresses.
- AI document indexing: owner-only. The Data section, and its switch, is hidden entirely for non-owners.
- Viewing the page: you can open Profile if you are an owner, or if your role can view firm contacts or firm addresses. If you have none of those, the Profile link is hidden and the page shows a "no access" message.
To learn how roles grant these kinds of access, see Roles and permissions. To see who in your firm holds the owner role, see Managing firm members.
Note: Even when a button is available, Esqase re-checks your access on the server when you save. If your access has changed since the page loaded, the save is declined and an error message explains it.
Common questions
I changed a setting but the button stays grayed out. Why? The Save changes button only becomes active once you make a real change. If you re-select the same value or revert your edit, the button disables again. For owner-only fields, the button stays disabled for non-owners no matter what.
I am an owner but I still cannot edit the name or currency. Confirm you are editing the right firm. The page always shows the firm that is active in the firm switcher. Switch to the correct firm, then try again.
Why does the currency field warn me when I change it? Changing currency affects only future transactions. Past invoices, payments, and other records keep the currency they were created with, so your historical totals stay accurate.